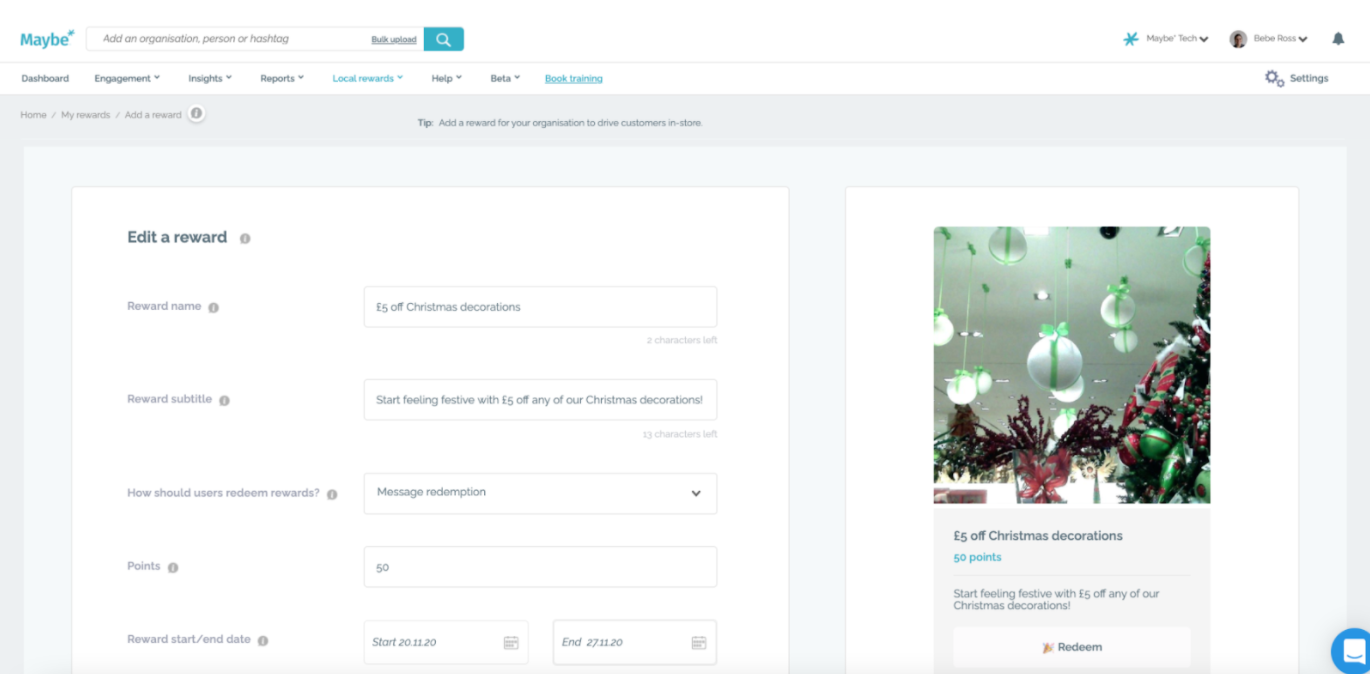
Next, you must choose how you want your customers to redeem your reward. Selecting ‘Message redemption’ means you can choose a special word that shoppers need to present to your team at the till. Alternatively, choosing ‘Message with a random code’ will assign your customers with a code to show when purchasing in-store. You can provide more information on these in the ‘How do people redeem their reward with you’ section.
Please note, we will shortly be releasing a third option, where you will be able to upload a list of your own codes to be redeemed.
You will then be able to choose how many points a shopper will need to redeem your reward. Keep in mind that customers get 100 points for free upon registering and earn points for each pound they spend through Local Rewards.
You can then select the start and end dates for your reward, with an option to add an ongoing end date. You can also assign your location by searching for your business address.
Next, under Your reward terms we have prefilled a template with your company name, which you can edit as needed.
Finally, upload a high-quality picture which is relevant to the reward and your business. You can check how this looks by viewing the previews on the right-hand side of the page. The top preview shows you what your reward will look like in the chatbot on a phone, while the bottom preview displays how your reward will look when shared to your social media.
Once you are happy with the previews, clicking Add a reward will take you to a new page where you can share the reward directly to your Facebook and Twitter pages. You can also download the image to share to Instagram.
Made a mistake anywhere? Once back on the Local Rewards page you can edit the reward by clicking on the pen icon in the My rewards section of the page.


