Create a Facebook Page for your business to interact with customers and promote your business. A Facebook Business Page is different to a personal profile. You’ll be able to add much more information about your business, advertise and even sell directly. Setting up a Facebook Business Page is really simple. There are a few things you’ll need to have to hand, like your business address and a profile and cover image but don’t worry we’ll walk you through it in easy to digest chunks.

How to create a Facebook Business Page
 by Amy Rountree
Step 1: Set up a Facebook Business Page
Step 1: Setting up a Facebook Page
To get started head to facebook.com/pages/creation on a desktop. Facebook provides you with two Page options to create a Facebook Page.
- Business or brand
- Community or public figure
Each type of Page comes with a slightly different set of features and tools. You’ll want to select 'Business or brand,' and then just click 'Get started.'
Use your business name or the name people are likely to search for when trying to find your business as your page name. This will be different to your username, but more on that later. You can then add categories to your business page. Facebook will try to be helpful and make some suggestions for you or you can select your own. You can select up to three.
Add a description to your Business Page and tell the world who you are. You only get 255 characters to show off, so make it clear who you are. Include information like when you were established, what you sell and where you can be found.
Already feeling overwhelmed? This video takes it right back to basics. It’s less than five minutes long and will show you what you’ll see when you create a Facebook Business Page.

How to create a Facebook Business Page
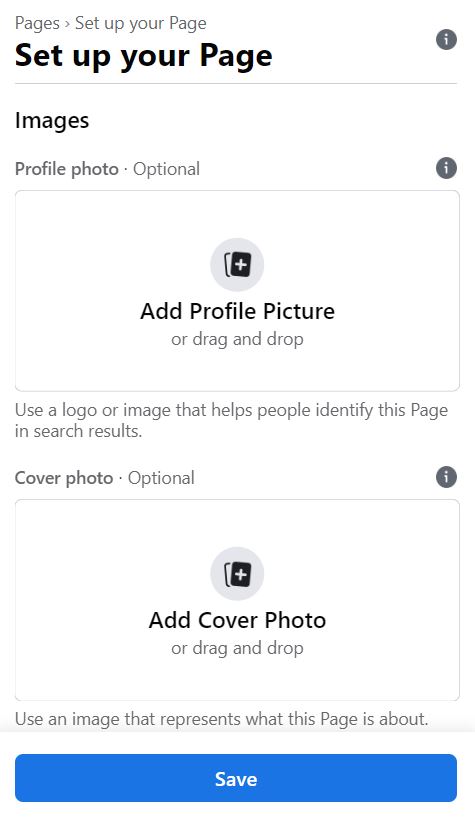
Step 2: Adding your Facebook profile picture and cover photo
You’ll be asked to upload a Facebook profile picture and cover photo when you create a Facebook account for your business. If you are wondering what Facebook size is needed, we’ve broken it down for you.
Facebook recommends that your profile picture (that’s the little circular one) be 170 by 170 pixels. Now, yes we know that’s a square. But you’ll upload a square picture and Facebook will make it circular for you. Make sure the image you use is clear, good quality and doesn’t contain anything in the corners of the image that will get lost when it’s transformed into a circle. You might want to use a brand logo or perhaps an image of your premises if you have one. Again, remember, a lot of people will find you on a mobile app or phone, so that profile pic is actually going to look really small. Try to keep it crisp and simple so customers will recognise you. Once you’re happy with the snap, click ‘Add Profile Picture’.
Your Cover Image is the banner that goes across the top of the page. It’s the biggest image on your page and Facebook is way more generous with the size recommendations for this showstopper. Facebook recommends you choose an image that’s 1640 x 856 pixels. You want a cover image that says 'Here we are'' or 'this is who we are'. Ultimately, pick something professional, on brand and of good quality that you are happy conveys who you are as a business. When you’ve got the image you want to use and are happy with how it looks, just click ' Add Cover Photo'
Step 3: How to add a page admin to your Facebook Page
When you create your Facebook Page for your business, you need to log into your personal Facebook account. Don’t be tempted to use a dummy or fake name on a Facebook profile to act as your Facebook Business Account Owner. Facebook wants to know that there is a real human being operating a business account and is taking steps to clamp down on fake accounts. Don’t worry, your personal profile details will never be publicly visible on your Business account.
You will also be able to invite other people or team members to manage your Facebook account on your behalf by adding them as ‘Page Admins’. You can do this after you have created the account.
Here we show you how to add a Page Admin to your Facebook account.

Add a page admin to your Facebook Page. Invite others to manage or work on your Facebook Business Page.
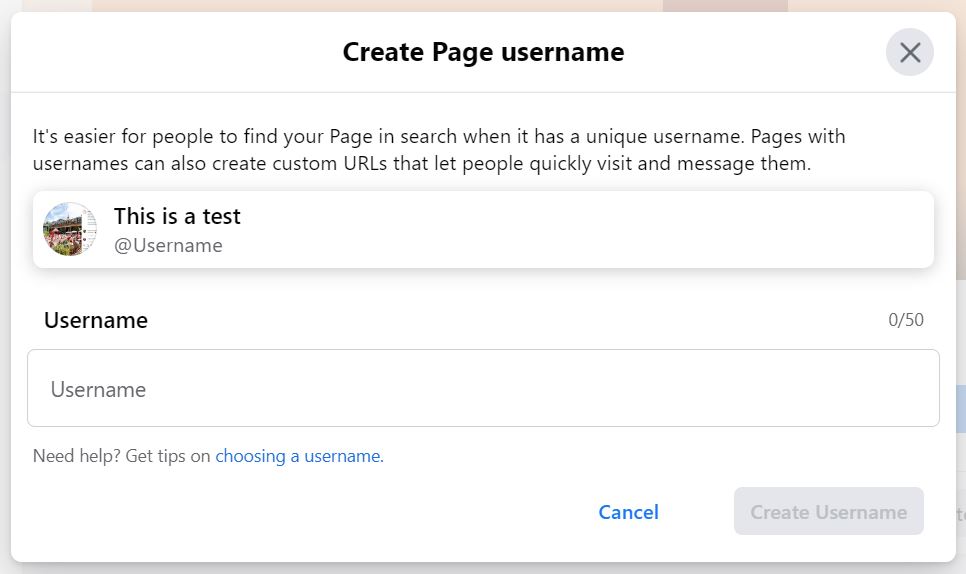
Step 4: Choosing a username for your page.
When you create a Facebook account for your business, you’re able to choose a username. Your username is different to the page name. It will become part of the link to your facebook page and what people can use to tag you into posts. It won’t have spaces in it. For example your business name might be Giuliano Deli-Cafe. Your username could be ‘giulianodelicafe’.
Your username can be up to 50 characters long, but you want it to be easy to remember. Your business name or an obvious variation is best. To create your username, click ‘Create Username’ on the Page preview.
Enter the name you want to use. Facebook will let you know if it’s available. If you get a green tick, it’s ready to rock. But if it’s already taken you might have to select something slightly different or use a variation of your business name. For example, if your business name is Giuliano Deli-Cafe. and that’s not available you might want to choose something like ‘giulianodelicafeputney’ Once you’ve chosen your username, click Create Username.
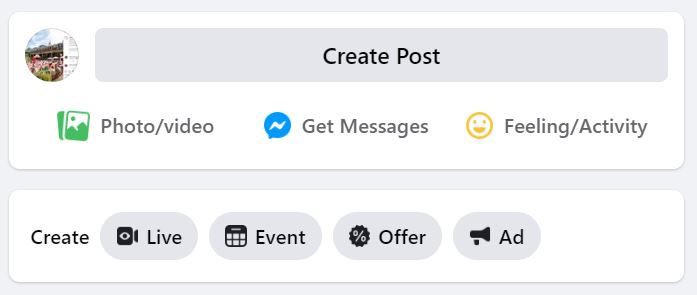
Step 5: How to post on Facebook
Now you’ve set up your Facebook Page, it’s time to put it to work. Great social media is about creating a conversation with people, rather than broadcasting at them. So what you post is crucial, but knowing how often to post is key to building the conversation with your customers, and ensuring it actually gets seen. When you post to Facebook it’s good to know the optimum amount of posts to make. If you have under 10,000 followers then post once a day, if you have more than this post twice a day. A good aim for all businesses is to post at least once a day, with a maximum of twice.
To create a post, use the ‘Create post’ button at the top of your page. You can add photos or videos to your post.
Don’t forget it’s not just about posting content. You should also make sure you share other people’s content on Facebook. You can do this by using the ‘Share’ button on any posts of other people or businesses that you are following on Facebook. Sharing is caring and it's a great way to build a network of other businesses in your place and support one another's content. Hugs all round.
How can Maybe* help?
Once you’ve created a Facebook Page you can use Maybe* to schedule all your Facebook posts, along with Instagram and Twitter from one place. The Maybe* Content calendar shows you all the content you have scheduled in one place, lets you create new posts, and compare your content to any competitor.

Save time by planning ahead. Schedule, post and view all your social media content across Facebook, Twitter and Instagram using our social media content calendar.
Need more help?
Every Tuesday at 10am our social media managers host a ‘Getting started with social media’ training session. So if you’re starting out as a complete novice we have you covered. No matter where you are with social media, this session will give you the confidence to get more from social media for your business.


Recent posts

Social media news roundup 23rd October – Instagram’s spicing up comments with polls, Facebook Pages hitting the airwaves, and more
Step right up and ride the digital carousel with us 🎠 As the wheels of the social media funfair whirl and twirl, platforms are aimin...

Don’t miss out on the ultimate guide to daily hashtags for social media success
Daily hashtags are a great source of content inspiration and a super way to increase your social media reach Daily hashtags are a ...